


|
Connector for Web Data
The Web Data connector allows the retrieval and processing of JSON, delimited Text (such as CSV, TSV), and XML data that is accessible over HTTP/HTTPS.
Steps:
1. Select the appropriate HTTP Method for the request from the following options:
· GET – retrieve data
· POST – add new data
· PUT – replace existing data
2. Enter the absolute URL of the web data including scheme (HTTP/HTTPS) into the URL field.
3. Click
 . A successful connection will result
to the following:
. A successful connection will result
to the following:
· The Connection Successful status is displayed along with some raw data returned by the server.
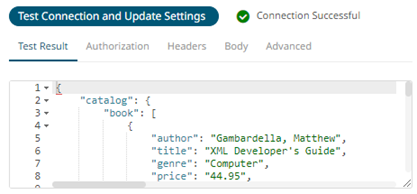
· Connector tries auto discovery of the Data Type.
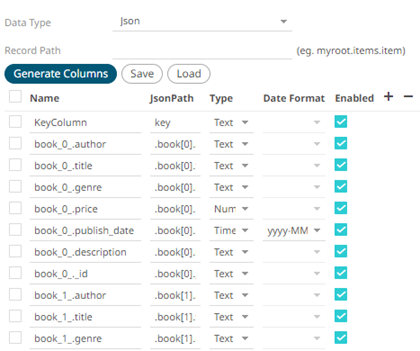
You can also opt to load or save a copy of the column definition.
4. Adjust the Authentication Type, if required.
4.1. Select the Authorization tab.
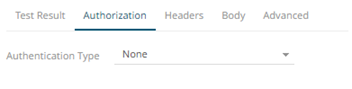
4.2. Set the required settings:
|
Authentication Type |
Description |
|
None |
No authentication needed. |
|
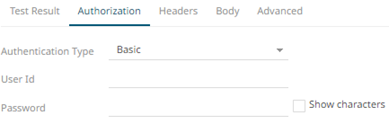
Basic |
Enter the User ID and Password to connect to the connector’s service. Select the Show Characters box to display the entered characters. |
|
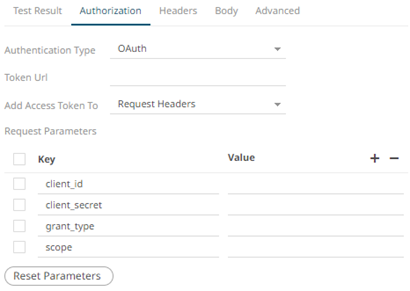
OAuth |
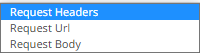
Some standard OAuth token request parameters come initialized with empty values. You can set these values and also add/remove any/all of the keys. Enter or select the following settings: · Token URL – The URL to retrieve the access token from. · Add Access Token To - The Access token retrieved from the Token URL can be added to headers, URL or request body, depending on how the endpoint needs the token. o Request Headers - A header is automatically added to the REST API request. o Request URL - The URL needs to be manually parameterised with a {access_token} parameter, before calling the REST API, the parameter is replaced with the actual token. o Request Body - The Request Body needs to be manually parameterised with a {access_token} parameter, before calling the REST API, the parameter is replaced with the actual token. NOTE: The given request parameters key/value pairs are formatted by the connector as application/xwww-form-urlencoded, and posted to Token URL. |
|
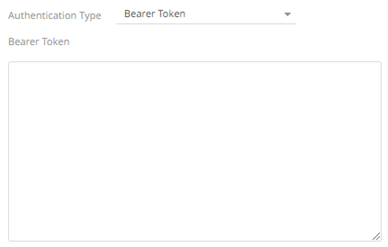
Bearer Token |
If you already have a authentication token, enter the token string into Bearer Token input box. This can be parameterized also. |
5. The Headers tab allows you to enter any custom headers required to be passed to the URL endpoint, typically to provide additional metadata. Enter any key/value pairs you need, and the connector will send them along with request.

6. Set the Body if a POST/PUT request is required.
6.1. Select the Body tab.
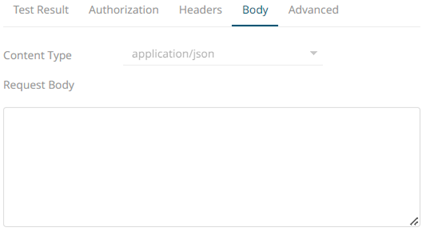
6.2. Set the required settings:
|
Property |
Description |
|
Content Type |
Select or enter content-type based on request body (payload) format. NOTE: This property is disabled when the HTTP Method is GET. |
|
Request Body |
The Request Body for the HTTP POST method. |
7. Set the Advanced settings, if needed.
7.1. Select the Advanced tab.
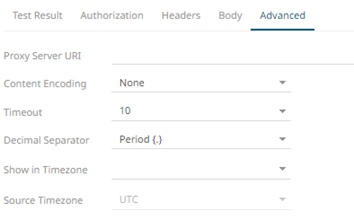
7.2. Set the required settings:
|
Property |
Description |
|
Proxy Server URI |
The HTTP Proxy setting that will allow the connector to reach the endpoint. |
|
Content Encoding |
Select the Content Encoding with the HTTP Header: None, GZip, Deflate, or GZip and Deflate |
|
Timeout |
The length of time to wait for the server response (10 to 300). Default is 10. |
|
Decimal Separator |
Select either the dot (.) or comma (,) as the decimal separator. |
|
File Encoding |
Set the character encoding to use in text data. · UTF-8 · UTF-16 · UTF-32 · US-ASCII · Windows-1252 |
7.3. You can opt to define the Show in Timezone and Source Timezone settings.