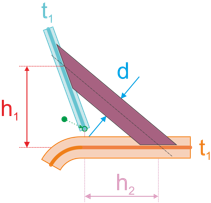
Hexa (Rigid)
This realization creates hexa elements between the links and connects the link elements with the hexas using singular or multiple rigids.
In the first case, only RBE3s are used, with the depended nodes coming from the hexa elements and the independent nodes coming from the links. For the second case, RBE2s connect the nodes of the hexa elements to the dependent nodes of the RBE3s.
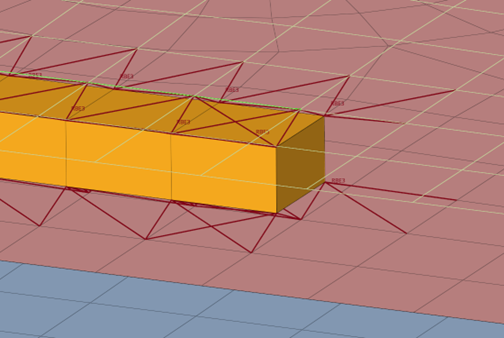
Figure 1. Hexa (Rigid) Realization Example with Singular Rigids
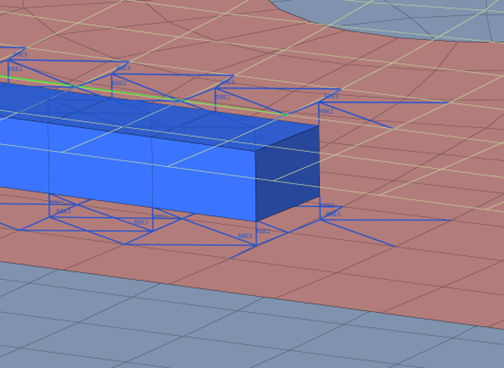
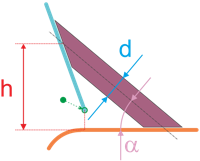
Figure 2. Hexa (Rigid) Realization Example with Single Rigids
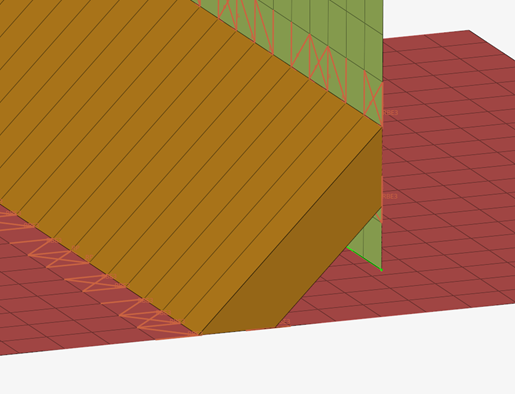
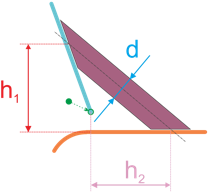
Figure 3. Hexa (Rigid) Realization Example with Singular Rigids
Legacy Realizations
- hexa (adhesive)
- hexa (RBE2 – RBE3)
Hexa Realization Options
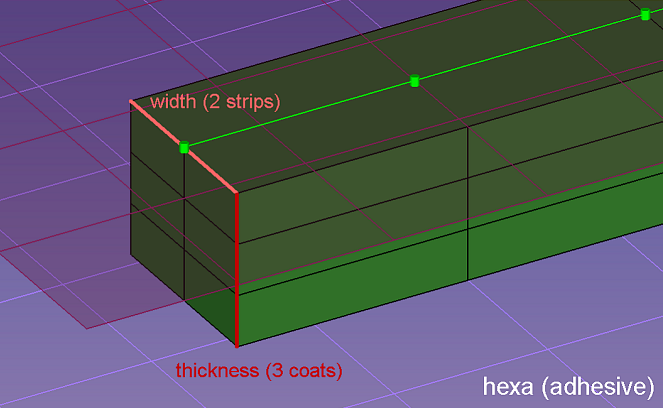
Figure 4.
| Option | Action |
|---|---|
| width | Define the width of the continuous hexa weld in the direction
perpendicular to the seam direction. Note: Only available for
hexa (adhesive) and hexa (RBE2-RBE3).
|
| strips | Define the number of hexa elements required along the width. |
| coats | Defines the number of hexa elements required along the thickness. |
| thickness |
Select a method for defining the thickness of a hexa
weld.
Note:
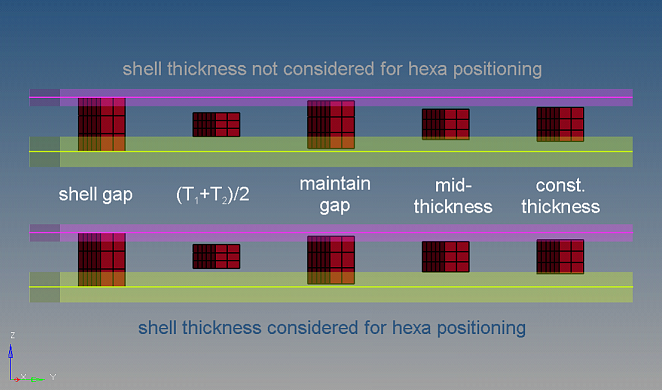 Figure 5. |
| thickness dependent / angle, D and H / H1, H2 and D |
Select a method to define how hexas are positioned and
located, and assign appropriate values to any corresponding inputs.
|
| discontinuity | By default, the length and pattern of a hexa weld is defined
by test points along the seam connector. To ignore the
predefined test points, and define a specific element length,
weld length, and break length to realize the connector with,
select the discontinuity checkbox. With this option, a hexa
adhesive seam with alternating weld pieces and gaps is created.
When discontinuity is enabled, you must define the
following inputs:
Note: Only available for
hexa (adhesive) realizations.
|
| hexa position to edge | Select a location to create the hexa from the edge.
Note: Only
available for hexa (adhesive) and hexa
(RBE2-RBE3).
|
| edge details |
In many cases, the connector position is not very
precise. To create the requested result, an automatic edge snapping can be enabled.
In the first step the connector snaps to, for example, the closest free edge, and
then from there the projection and FE creation starts. Select how many element rows
away from the free edge to snap the connector to for L and T connections.
|
