Align and Project Elements

Use the Align/Project tool to project entities to lines, surfaces, or planes then remap and offset projected nodes.

From the Topology ribbon, click the Align/Project tool.


Figure 1.

Align to Lines

Use the Line tool to project nodes or points to a line along a user-defined direction or the normal to the line selected, then remap or offset over selected reference entities.

  1. From the secondary ribbon, click the Lines tool.


    Figure 2.
  2. Select ordered nodes, FE edges, or points as source geometry to align/project to onto target entities.
  3. Check Use end nodes to auto-detect end nodes based on your source selection and align between them. Otherwise, select target entities to align to.
  4. Use the icons in the microdialog further refine the alignment:
    • - Define a single direction using the Vector tool. All of the entities are projected along this direction.
    • - Use the normal to the line at each point on the line to determine the direction of projection.
    • - Remap projected nodes to they are dispersed evenly over the length of the line.
    • - If two nodes or targets are selected, toggle to make the connecting line finite/infinite.
    • - Offset the target line by the specified value
  5. Click .
The following examples show several different alignment use cases.
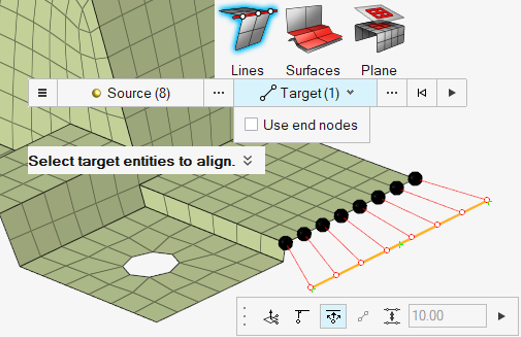
  • Project source nodes on to a target line
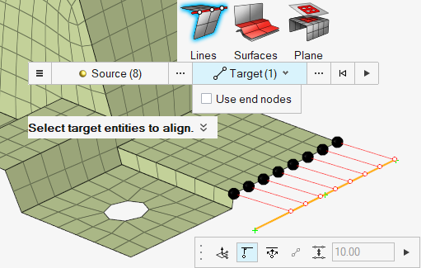

    Figure 3.
  • Project nodes on to a smooth line (smooth lines can be defined using the location entity)
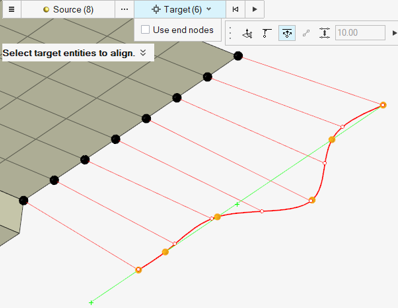

    Figure 4.
  • Align nodes between start and end nodes
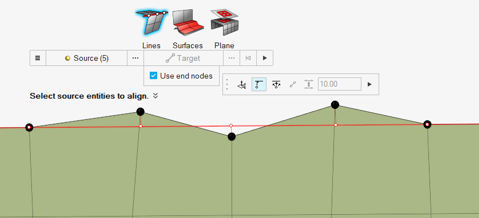

    Figure 5.
  • Align nodes with respect to reference nodes
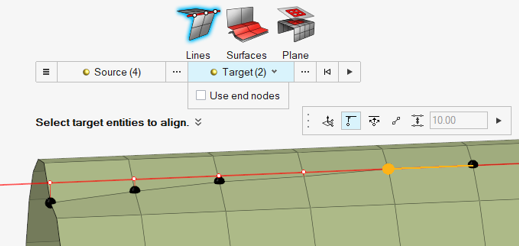

    Figure 6.
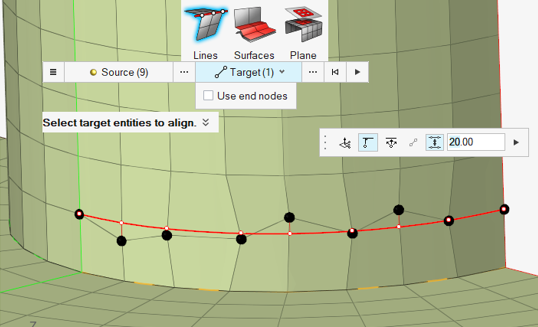
  • Align + Remap


    Figure 7.
  • Align + Offset


    Figure 8.

Align to Surfaces

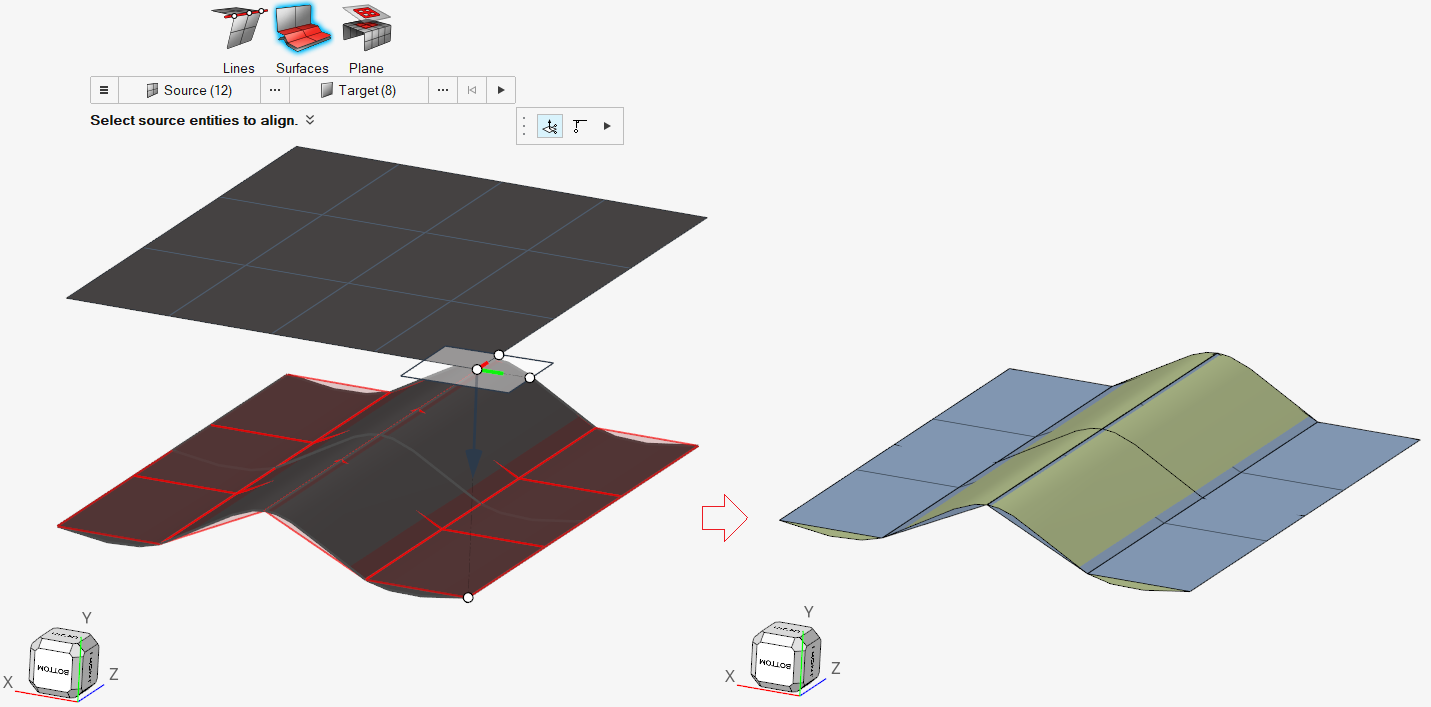
Use the Surfaces tool to project nodes, elements, lines and points onto a surface along either a user-defined direction or the normal to the surface selected.

  1. From the secondary ribbon, click the Surfaces tool.


    Figure 9.
  2. Select nodes, elements, lines, or points as source entities to be projected onto the target surface.
  3. Use the Target selector to choose the target surface.
  4. Use the options in the microdialog determine the alignment.
    • - Define a single direction using the Vector tool. All of the entities are projected along this direction.
    • - Use local surface normals for projection to account for any surface curvature.
  5. Click


    Figure 10.

Align to Planes

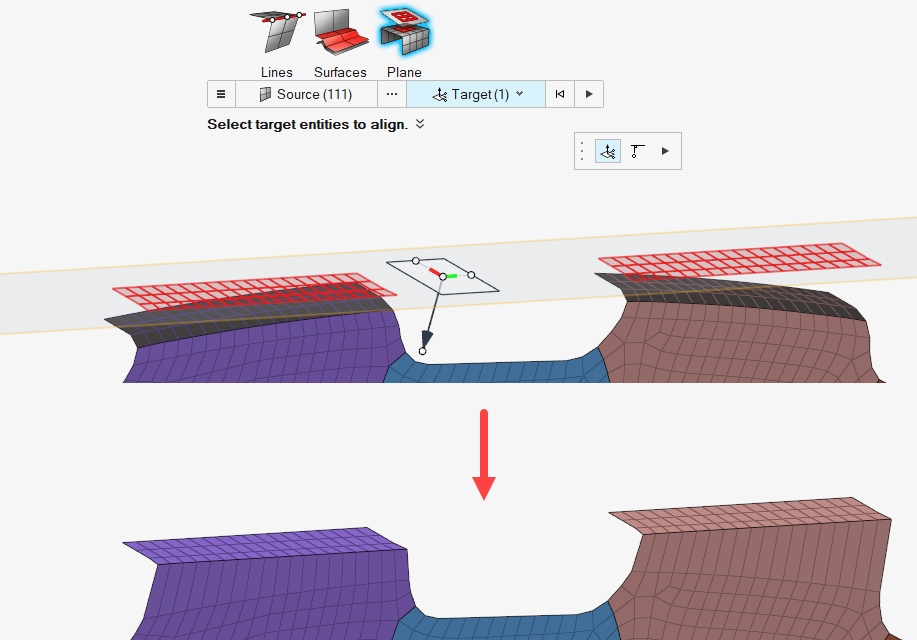
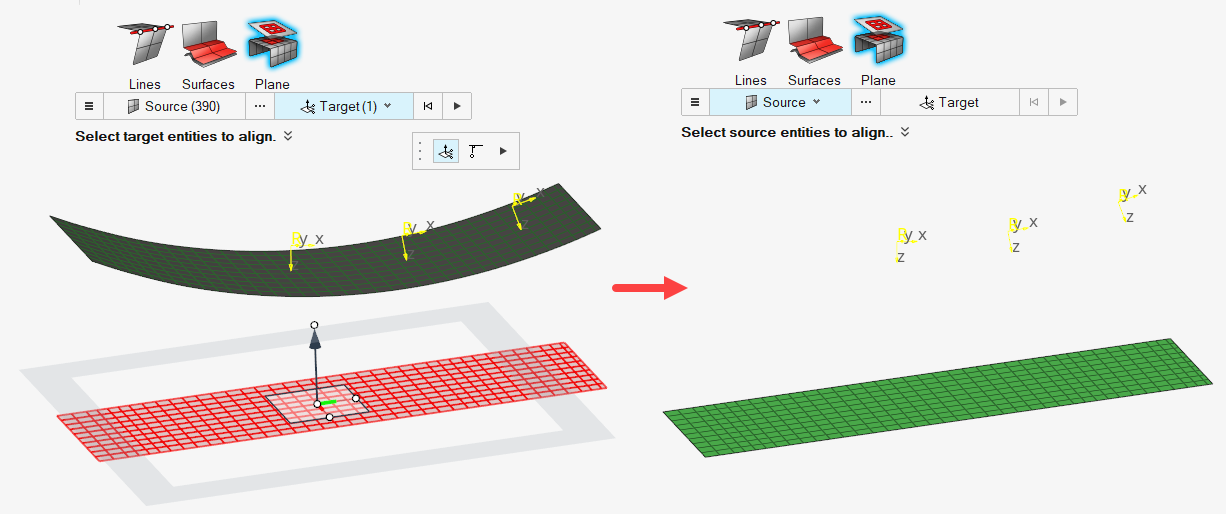
Use the Planes tool to project nodes, elements, lines and points onto a plane along a user-defined direction

  1. From the secondary ribbon, click the Planes tool.


    Figure 11.
  2. Select nodes, elements, lines, or points as source entities to be projected onto the target plane.
  3. Use the Target selector on the guide bar to select between a plane or a direction.
    • Plane - Use the Plane tool to align/project.

      The plane could be aligned to a surface/mesh/nodes, and so on.

    • Direction - Use the Vector tool to define the direction of projection. All of the selected entities are projected along the same direction.
  4. Use the microdialog options to project your source entities normal to your target plane or along a defined vector.
  5. Click


    Figure 12.


    Figure 13.